Claude)Python)写真を美肌に編集加工するWindowsアプリ作成(1)。毛穴やシミを目立たなくする。ソフトフォーカス。
Pythonで、写真の人物を美肌にするWindowsアプリ作成。毛穴を目立たなくする。このバージョンでは、AIによる人物の顔判別はしていない。背景も含めて全体にソフトフォーカスをかける感じ。
Pythonの「PIL/Pillow(RGB)ライブラリ」を使用。
【Pythonプログラム】
- 写真はドラッグ&ドロップでアプリに取り込める。
- 美肌効果をスライダーで調整できる。
- 美肌効果を画面上で確認できる。アプリのウインドウサイズを拡大縮小でプレビュー画像も拡大縮小する。
- 保存ボタンを押したら、元の写真と同じフォルダーに「オリジナルファイル名-美肌」という名前で保存する。

【Pythonライブラリインストール】
次のライブラリが必要なので、インストールする。
pip install Pillow PyQt5 numpy
【Pythonプログラムコード】
import sys
import os
from PIL import Image, ImageFilter, ImageEnhance, ImageDraw
import numpy as np
from PyQt5.QtWidgets import (QApplication, QMainWindow, QLabel, QPushButton,
                             QSlider, QVBoxLayout, QHBoxLayout, QWidget, QMessageBox)
from PyQt5.QtCore import Qt, QTimer
from PyQt5.QtGui import QPixmap, QImage, QDragEnterEvent, QDropEvent

class BeautySkinApp(QMainWindow):
    def __init__(self):
        super().__init__()
        self.setWindowTitle("美肌処理アプリ")
        self.setGeometry(100, 100, 1200, 800)

        self.original_image = None
        self.processed_image = None
        self.image_path = None
        self.current_intensity = 70

        # スライダー更新用タイマー
        self.update_timer = QTimer()
        self.update_timer.setSingleShot(True)
        self.update_timer.timeout.connect(self.process_image)

        self.init_ui()

    def init_ui(self):
        # メインウィジェット
        main_widget = QWidget()
        self.setCentralWidget(main_widget)
        main_layout = QVBoxLayout()
        main_widget.setLayout(main_layout)

        # 画像表示エリア
        self.image_label = QLabel()
        self.image_label.setAlignment(Qt.AlignCenter)
        self.image_label.setMinimumSize(1000, 600)
        self.image_label.setStyleSheet("""
            QLabel {
                background-color: #2b2b2b;
                border: 3px dashed #666;
                border-radius: 10px;
                color: #999;
                font-size: 16px;
            }
        """)
        self.image_label.setText("ここに画像をドラッグ&ドロップ\n(JPG, PNG, BMP対応)")
        main_layout.addWidget(self.image_label, 1)

        # コントロールエリア
        control_widget = QWidget()
        control_widget.setStyleSheet("background-color: #1e1e1e; padding: 15px; border-radius: 8px;")
        control_layout = QHBoxLayout()
        control_widget.setLayout(control_layout)

        # スライダーラベル
        slider_label = QLabel("美肌効果:")
        slider_label.setStyleSheet("color: white; font-size: 15px; font-weight: bold;")
        control_layout.addWidget(slider_label)

        # 美肌効果スライダー
        self.beauty_slider = QSlider(Qt.Horizontal)
        self.beauty_slider.setMinimum(0)
        self.beauty_slider.setMaximum(100)
        self.beauty_slider.setValue(70)
        self.beauty_slider.setEnabled(False)
        self.beauty_slider.setStyleSheet("""
            QSlider::groove:horizontal {
                border: 1px solid #555;
                height: 10px;
                background: #333;
                border-radius: 5px;
            }
            QSlider::handle:horizontal {
                background: #4CAF50;
                border: 2px solid #45a049;
                width: 20px;
                margin: -6px 0;
                border-radius: 10px;
            }
            QSlider::handle:horizontal:hover {
                background: #45a049;
            }
        """)
        self.beauty_slider.valueChanged.connect(self.on_slider_changed)
        control_layout.addWidget(self.beauty_slider, 1)

        # スライダー値表示
        self.value_label = QLabel("70%")
        self.value_label.setStyleSheet("color: white; font-size: 15px; font-weight: bold; min-width: 60px;")
        control_layout.addWidget(self.value_label)

        main_layout.addWidget(control_widget)

        # ボタンエリア
        button_widget = QWidget()
        button_widget.setStyleSheet("background-color: #1e1e1e; padding: 10px;")
        button_layout = QHBoxLayout()
        button_widget.setLayout(button_layout)

        button_layout.addStretch()

        # 保存ボタン
        self.save_button = QPushButton("💾 保存")
        self.save_button.setEnabled(False)
        self.save_button.setStyleSheet("""
            QPushButton {
                background-color: #4CAF50;
                color: white;
                font-size: 16px;
                font-weight: bold;
                padding: 12px 40px;
                border-radius: 6px;
                border: none;
            }
            QPushButton:hover {
                background-color: #45a049;
            }
            QPushButton:disabled {
                background-color: #333;
                color: #666;
            }
        """)
        self.save_button.clicked.connect(self.save_image)
        button_layout.addWidget(self.save_button)

        main_layout.addWidget(button_widget)

        # ドラッグ&ドロップを有効化
        self.setAcceptDrops(True)

    def dragEnterEvent(self, event: QDragEnterEvent):
        if event.mimeData().hasUrls():
            event.acceptProposedAction()

    def dropEvent(self, event: QDropEvent):
        files = [u.toLocalFile() for u in event.mimeData().urls()]
        if files:
            file_path = files[0]
            if file_path.lower().endswith(('.png', '.jpg', '.jpeg', '.bmp', '.tiff', '.webp')):
                self.load_image(file_path)
            else:
                QMessageBox.warning(self, "エラー", "サポートされていない画像形式です。\nJPG, PNG, BMPなどの形式をご使用ください。")

    def load_image(self, file_path):
        """画像を読み込む"""
        try:
            self.image_path = file_path
            self.original_image = Image.open(file_path).convert('RGB')

            # UI更新
            self.beauty_slider.setEnabled(True)
            self.save_button.setEnabled(True)

            # 初期効果を適用
            self.process_image()

        except Exception as e:
            QMessageBox.warning(self, "エラー", f"画像の読み込みに失敗しました。\n{str(e)}")

    def on_slider_changed(self, value):
        """スライダー変更時(遅延処理でスムーズに)"""
        self.current_intensity = value
        self.value_label.setText(f"{value}%")

        # タイマーをリセットして再スタート(200ms後に処理)
        self.update_timer.stop()
        self.update_timer.start(200)

    def process_image(self):
        """美肌処理を実行"""
        if self.original_image is None:
            return

        intensity = self.current_intensity / 100.0

        if intensity == 0:
            self.processed_image = self.original_image.copy()
        else:
            self.processed_image = self.apply_beauty_effect(self.original_image, intensity)

        self.display_image()

    def apply_beauty_effect(self, image, intensity):
        """
        高品質な美肌効果を適用
        PIL/Pillowベースで色再現性を重視
        """
        # NumPy配列に変換
        img_array = np.array(image, dtype=np.float32)

        # 1. 基本的な平滑化(Pillow使用)
        pil_img = image.copy()

        # 強度に応じた平滑化
        radius = 2 + int(intensity * 4)
        smoothed = pil_img.filter(ImageFilter.GaussianBlur(radius=radius))

        # 2. エッジ検出でマスクを作成
        edges = pil_img.filter(ImageFilter.FIND_EDGES)
        edge_array = np.array(edges.convert('L'), dtype=np.float32) / 255.0
        edge_array = 1.0 - edge_array  # 反転(エッジ以外を保護)

        # エッジマスクを3チャンネルに拡張
        edge_mask = np.stack([edge_array] * 3, axis=-1)

        # 3. ディテール保持フィルタ
        detail = pil_img.filter(ImageFilter.DETAIL)
        detail_array = np.array(detail, dtype=np.float32)

        # 4. 平滑化画像とオリジナルをブレンド
        smoothed_array = np.array(smoothed, dtype=np.float32)

        # エッジ部分は保護、肌の部分は平滑化
        blend_strength = intensity * 0.7
        blended = img_array * (1 - blend_strength * edge_mask) + smoothed_array * (blend_strength * edge_mask)

        # 5. 微細なディテールを戻す
        detail_strength = 0.15 * (1 - intensity * 0.5)
        result = blended * (1 - detail_strength) + detail_array * detail_strength

        # PIL Imageに戻す
        result = np.clip(result, 0, 255).astype(np.uint8)
        result_img = Image.fromarray(result)

        # 6. 明るさとコントラストの微調整
        enhancer_brightness = ImageEnhance.Brightness(result_img)
        result_img = enhancer_brightness.enhance(1.0 + intensity * 0.08)

        enhancer_contrast = ImageEnhance.Contrast(result_img)
        result_img = enhancer_contrast.enhance(1.0 + intensity * 0.05)

        # 7. 色の彩度を微調整(自然な肌色)
        enhancer_color = ImageEnhance.Color(result_img)
        result_img = enhancer_color.enhance(1.0 + intensity * 0.1)

        # 8. シャープネスを微調整
        enhancer_sharpness = ImageEnhance.Sharpness(result_img)
        result_img = enhancer_sharpness.enhance(1.0 - intensity * 0.2)

        return result_img

    def display_image(self):
        """画像をラベルに表示(ウィンドウサイズに合わせて拡大縮小)"""
        if self.processed_image is None:
            return

        # PIL ImageをQPixmapに変換
        img_copy = self.processed_image.copy()

        # ラベルのサイズを取得
        label_size = self.image_label.size()

        # アスペクト比を維持してリサイズ
        img_copy.thumbnail((label_size.width(), label_size.height()), Image.Resampling.LANCZOS)

        # QImageに変換
        img_array = np.array(img_copy)
        height, width, channel = img_array.shape
        bytes_per_line = 3 * width
        q_image = QImage(img_array.data, width, height, bytes_per_line, QImage.Format_RGB888)

        pixmap = QPixmap.fromImage(q_image)
        self.image_label.setPixmap(pixmap)

    def resizeEvent(self, event):
        """ウィンドウリサイズ時にプレビュー画像も更新"""
        super().resizeEvent(event)
        if self.processed_image is not None:
            # リサイズ後すぐに表示を更新
            QTimer.singleShot(10, self.display_image)

    def save_image(self):
        """画像を保存"""
        if self.processed_image is None or self.image_path is None:
            return

        try:
            # ファイル名を生成
            directory = os.path.dirname(self.image_path)
            filename = os.path.basename(self.image_path)
            name, ext = os.path.splitext(filename)

            # 拡張子がない場合はJPGにする
            if not ext:
                ext = '.jpg'

            new_filename = f"{name}-美肌{self.current_intensity}{ext}"
            save_path = os.path.join(directory, new_filename)

            # 元の画像サイズで保存(表示用ではなく処理済み画像)
            self.processed_image.save(save_path, quality=95, optimize=True)

            QMessageBox.information(
                self,
                "保存完了",
                f"画像を保存しました:\n{new_filename}"
            )

        except Exception as e:
            QMessageBox.warning(self, "エラー", f"画像の保存に失敗しました。\n{str(e)}")

def main():
    app = QApplication(sys.argv)
    app.setStyle('Fusion')  # モダンなスタイル
    window = BeautySkinApp()
    window.show()
    sys.exit(app.exec_())

if __name__ == "__main__":
    main()
【サンプル画像】
オリジナル画像は、生成AIで作成。
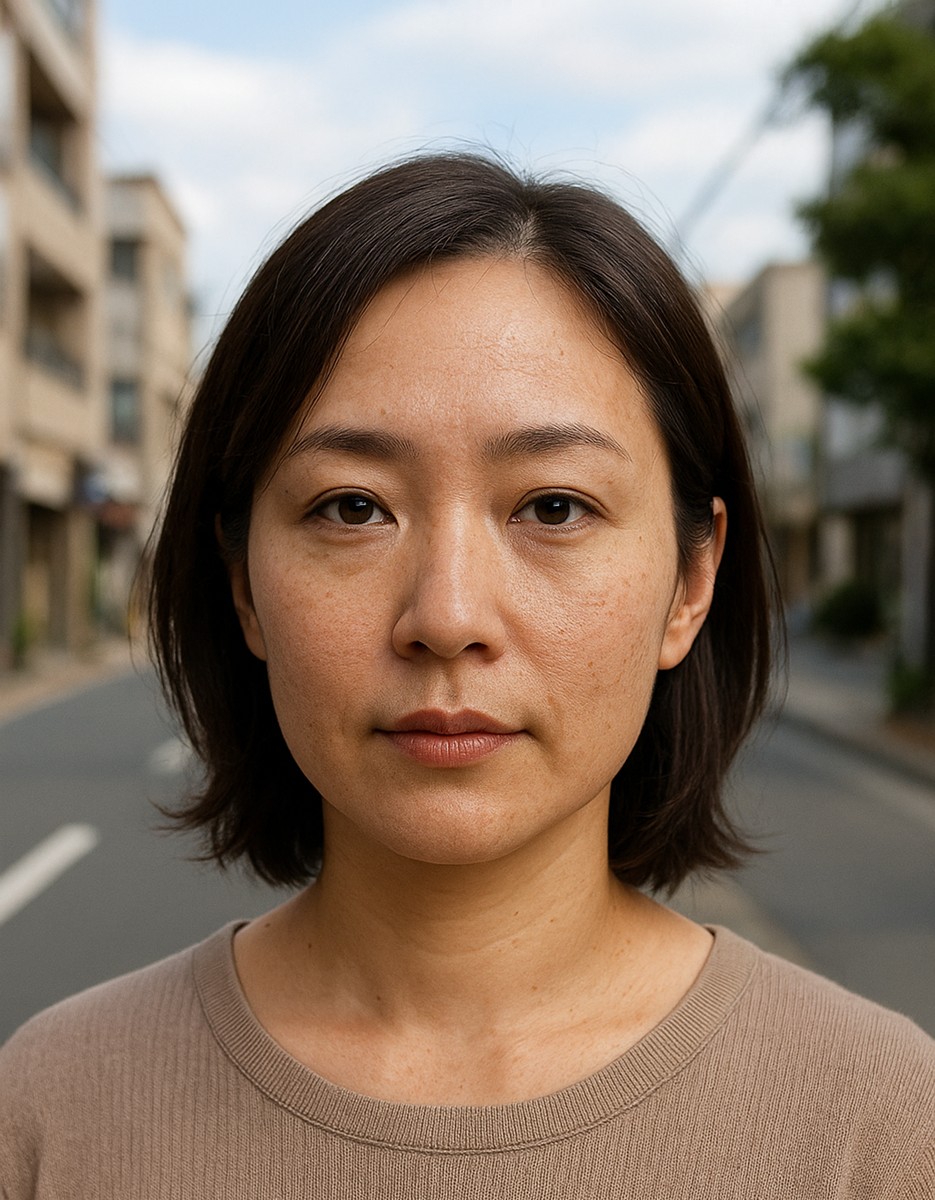
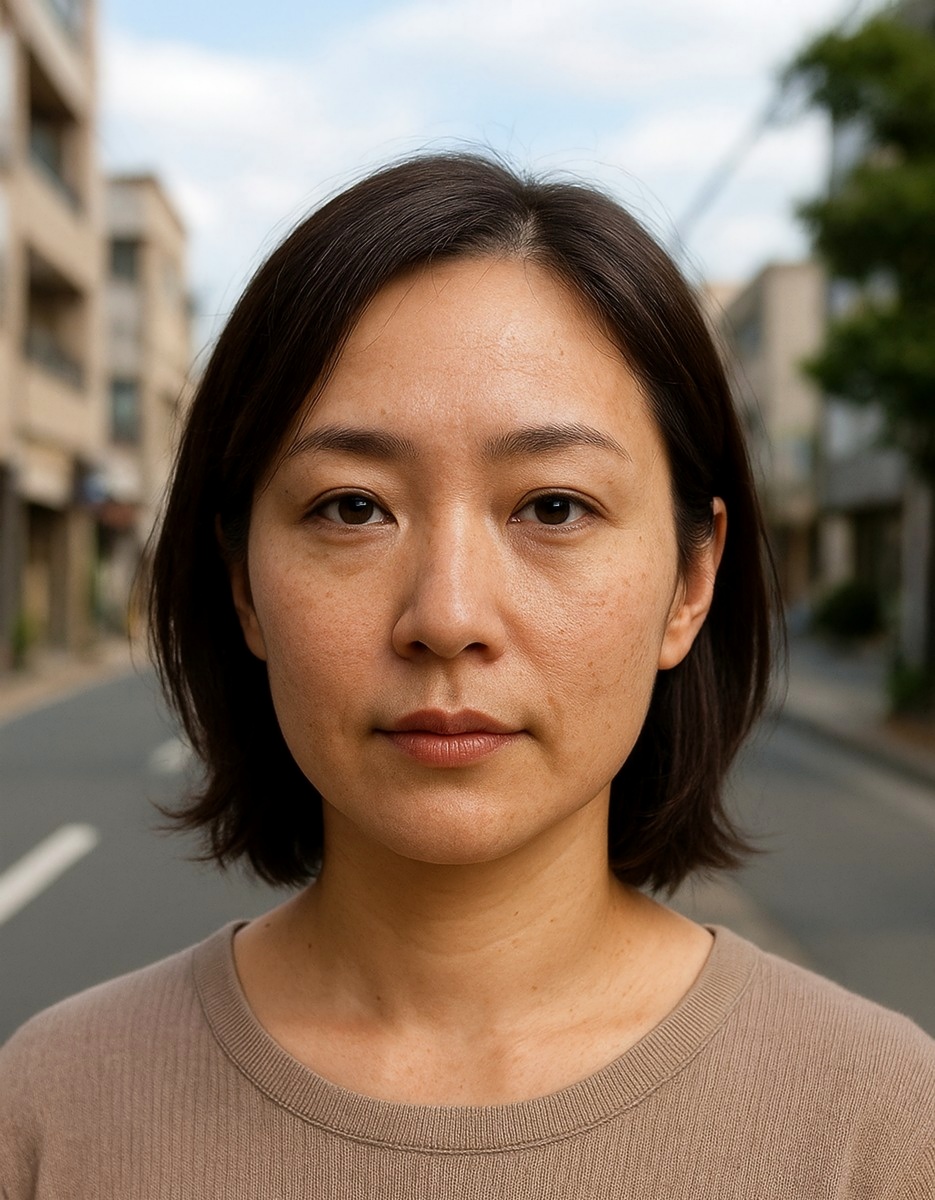
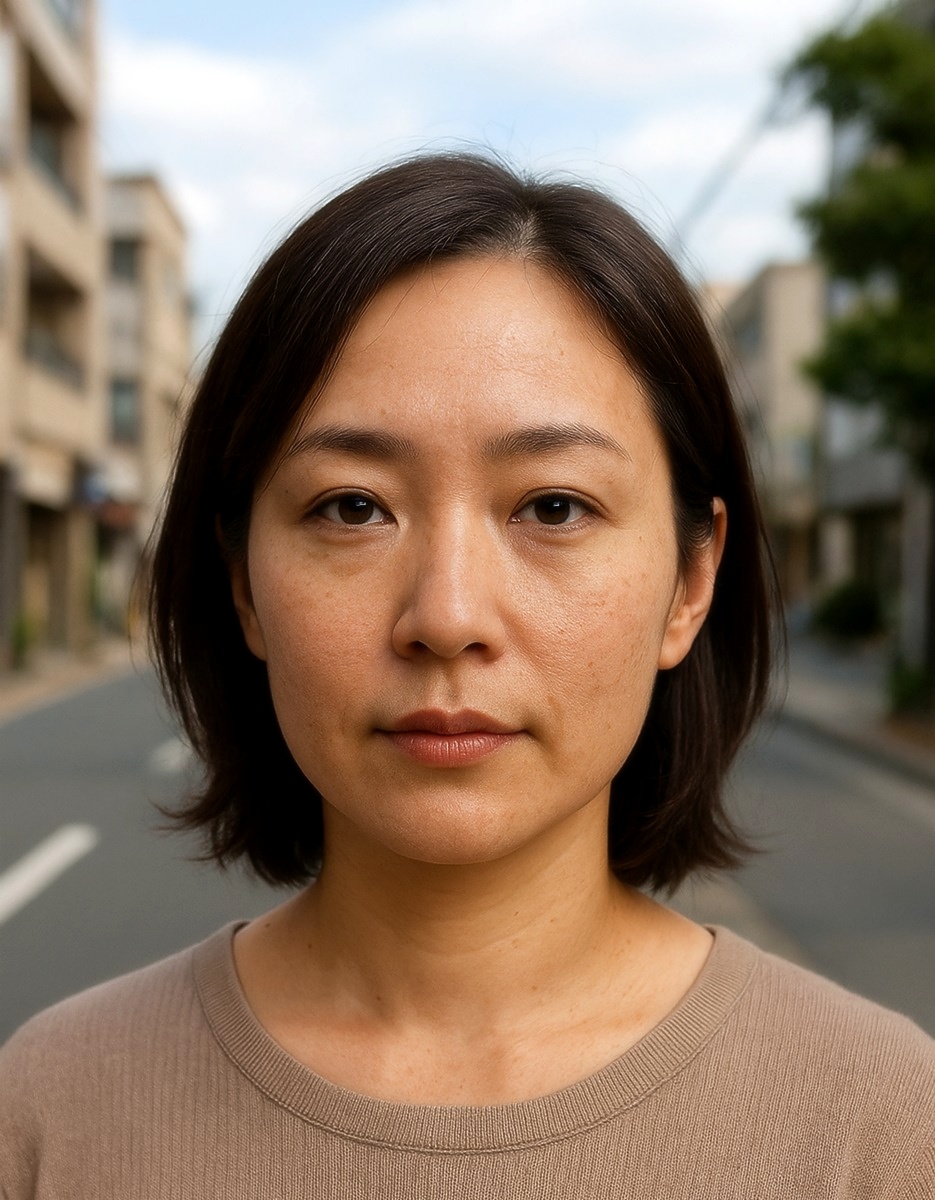
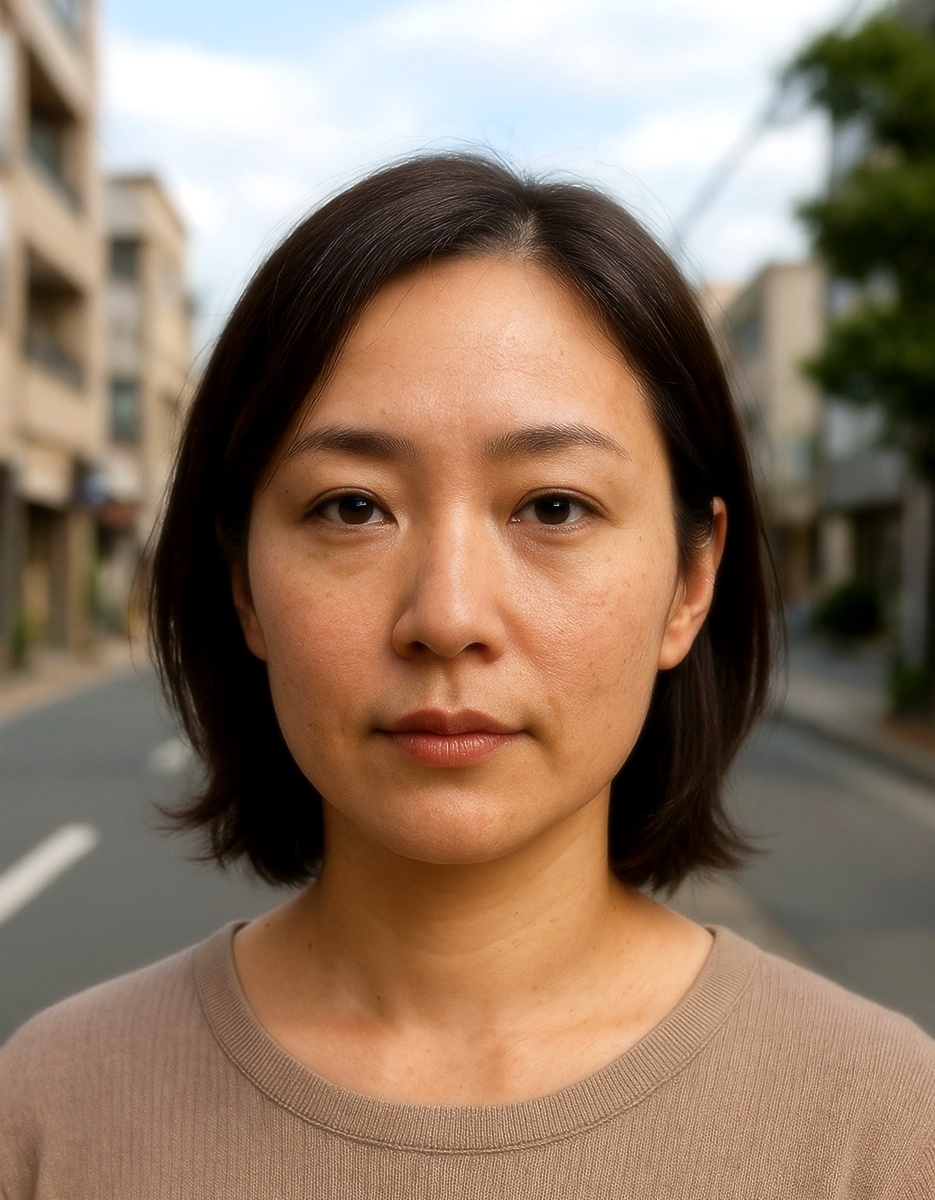
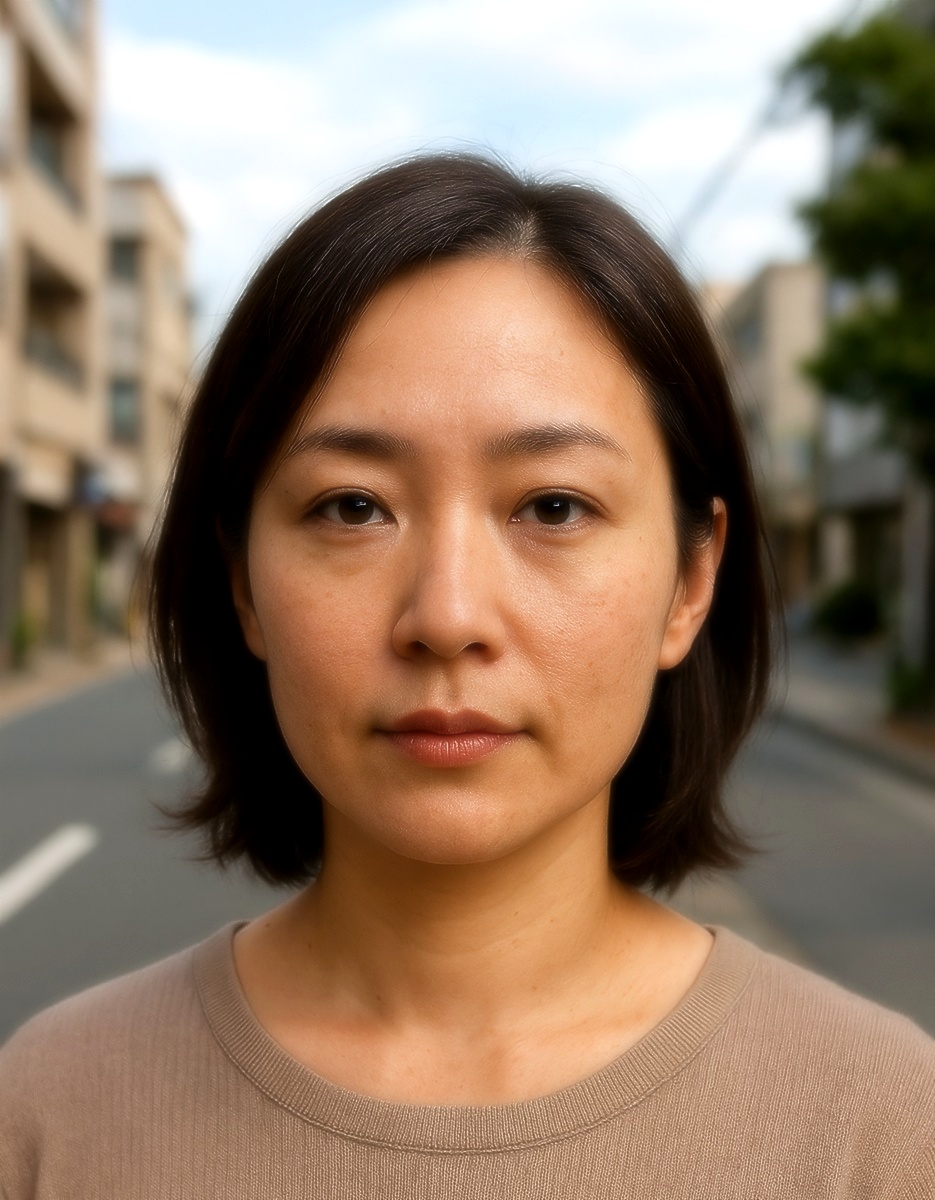
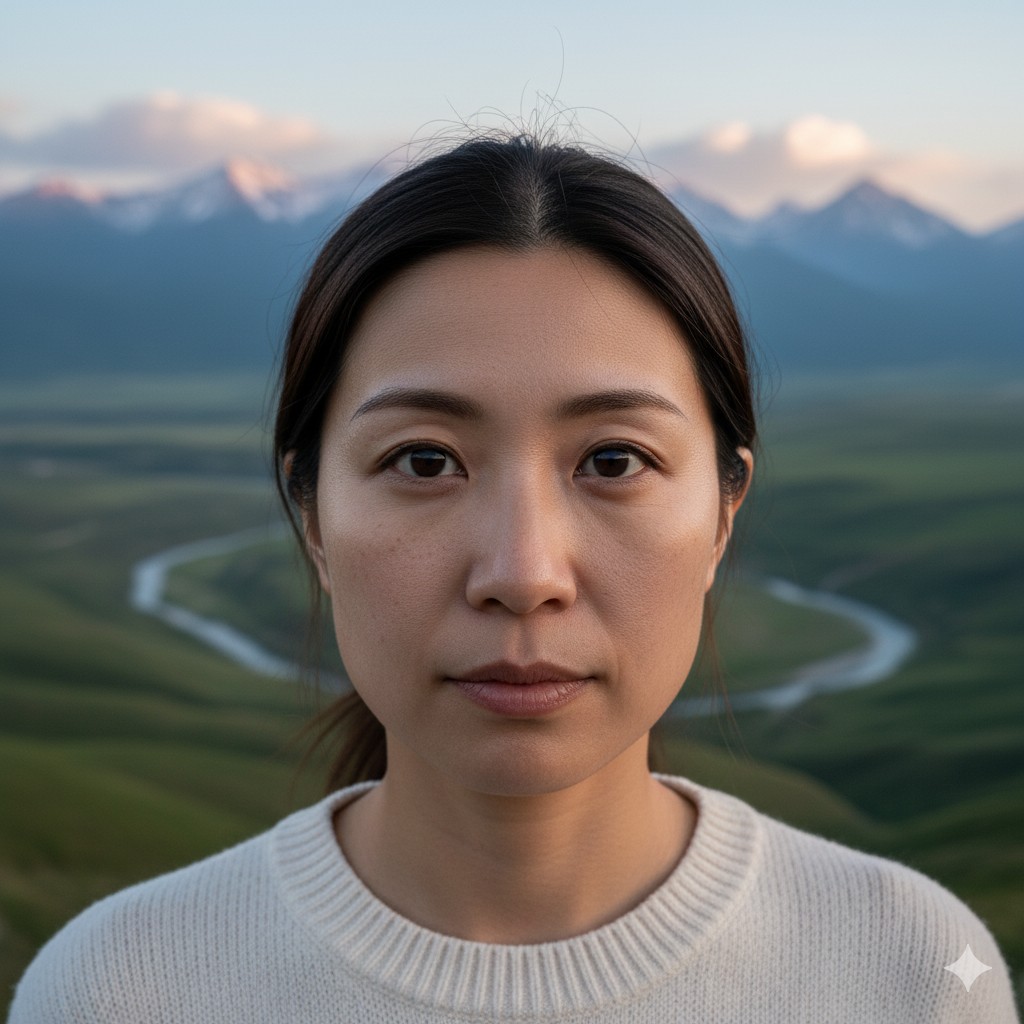
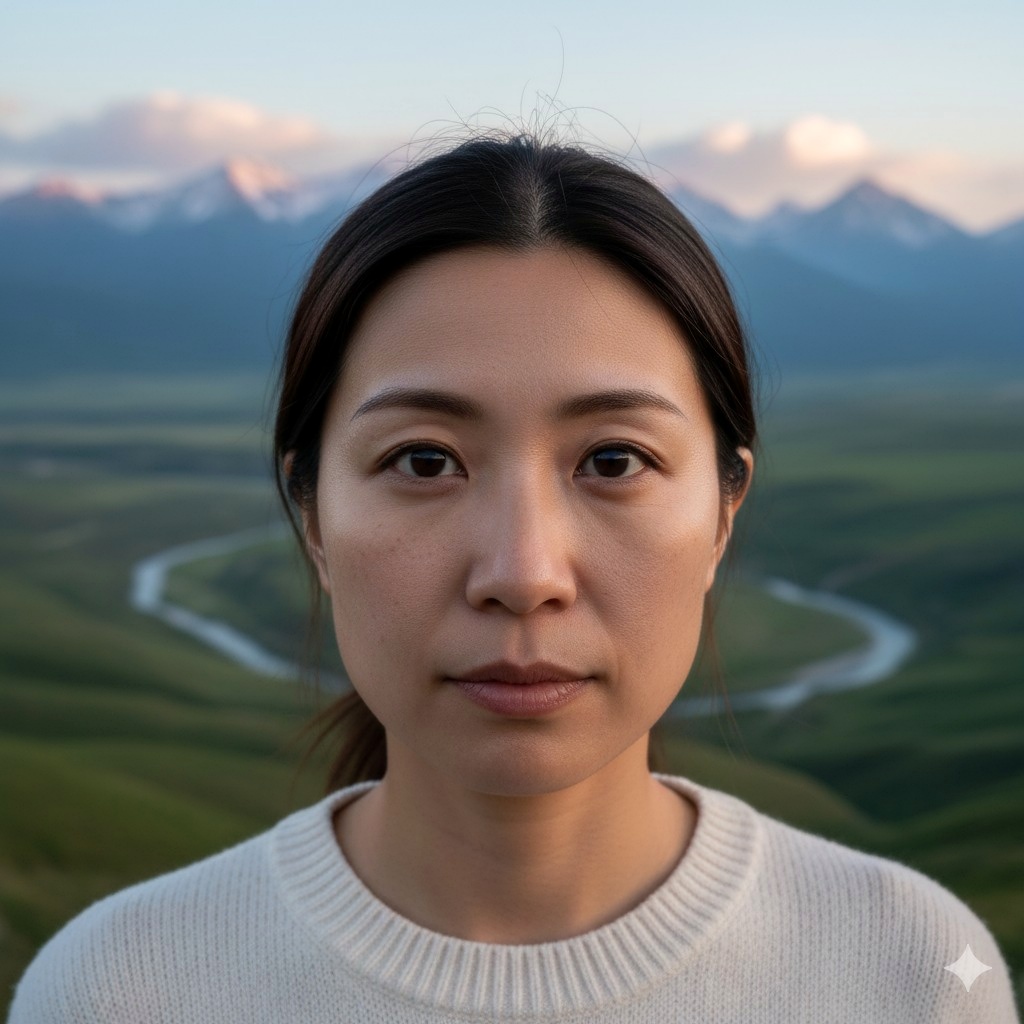
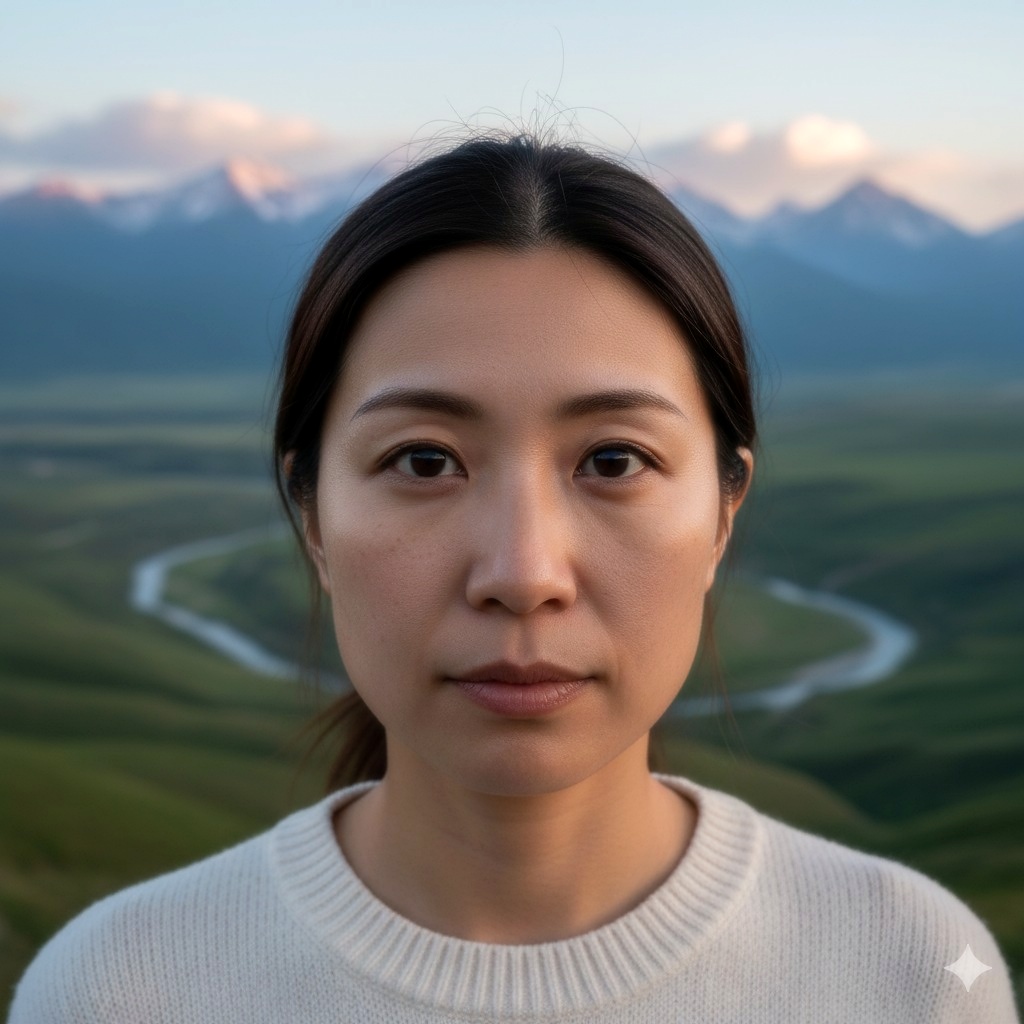
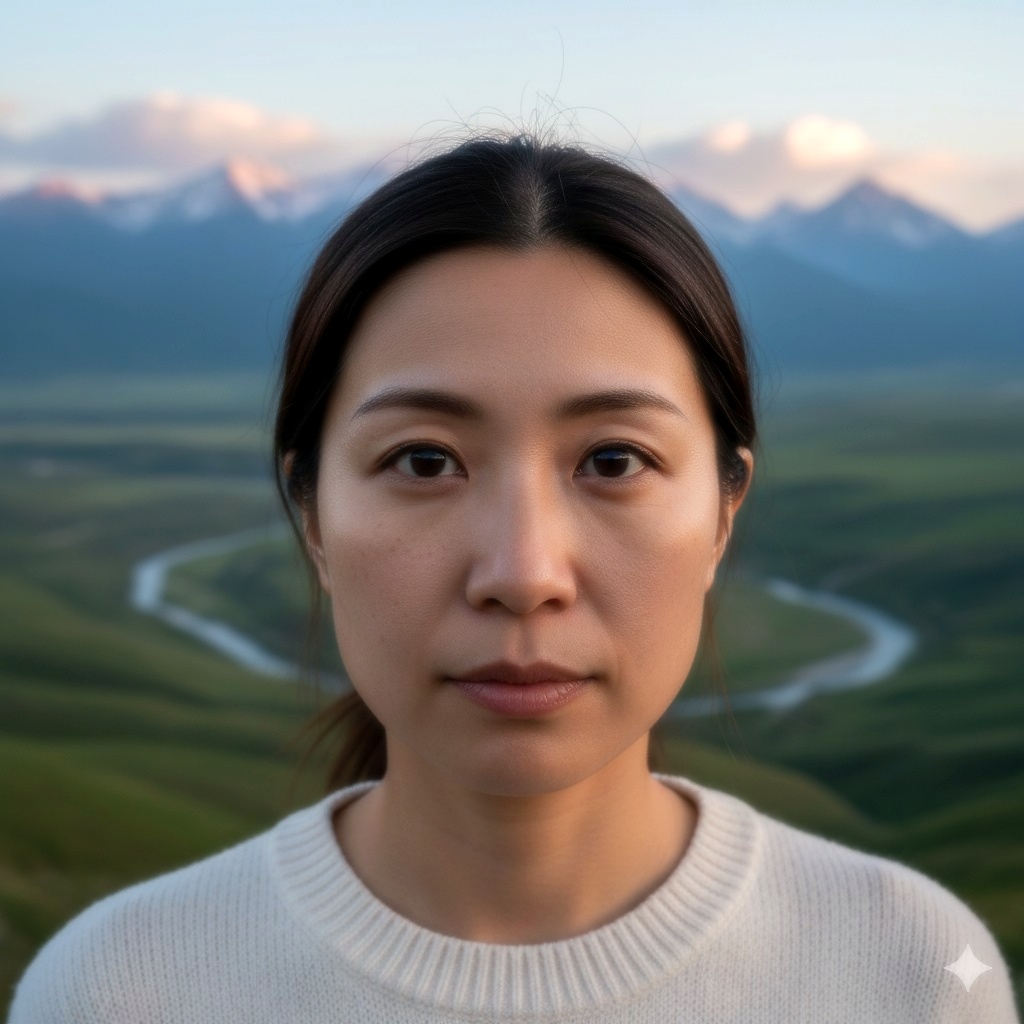
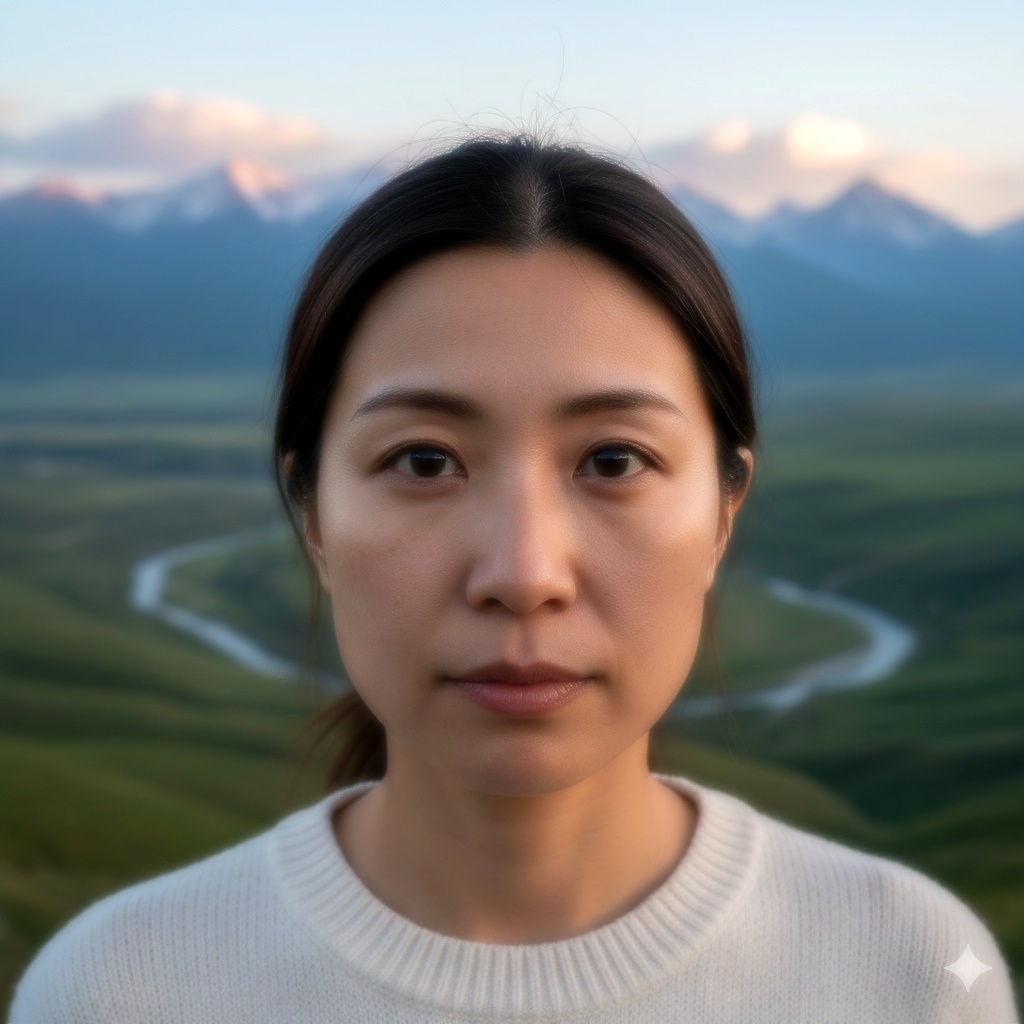
※(↓)AIによる人物判別ありバージョン。

※ (↓)更なる改良バージョン。

※ (↓)更なる改良バージョン。

※ (↓)更なる改良バージョン。


